Facebook Pixel for Ads Guide [Setup, Tracking, & Events]
For any entrepreneur or business owner who runs Facebook and Instagram Ads to their site, using the Facebook Pixel gives an incredible advantage.
What is a Facebook Pixel?
The official definition for a Facebook Pixel states that it is "an analytics tool that allows you to measure the effectiveness of your advertising by understanding the actions people take on your website."
Put quite simply; Facebook Pixel is a little piece of code that you add to your website so you can monitor what actions your customers and visitors are taking.
The Advantage of using Facebook Pixel for Ads
The Facebook Pixel is triggered by cookies placed on your sites, which your audience or customers have to activate. This activation typically happens when a customer takes action, which Facebook Pixel will record as an Event.
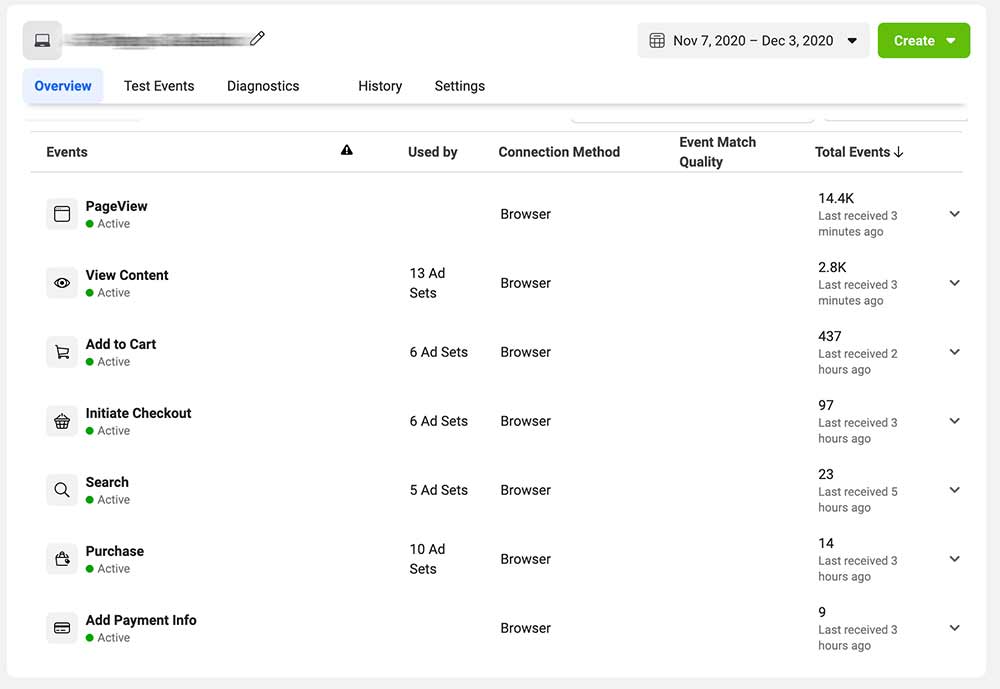
For instance, if you are using Facebook Pixel on Shopify when a customer views an item or adds it to their cart, that is considered an event to Facebook. It’ll be automatically logged in the Event Manager section of your Facebook pixel page. Through the Event Manager, you can see all your customers' actions and you can also retarget them with Facebook ads.
Once the Pixel is active, it allows you to achieve the following:

Tracking and Retargeting
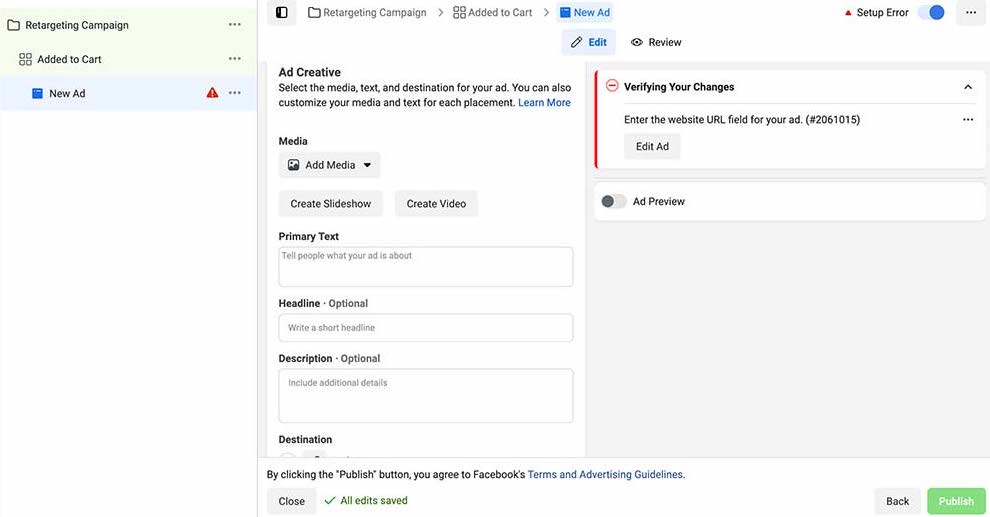
With Facebook Pixel on your site, you can continue to show ads to past visitors who have completed a specific action, e.g., if you run an e-commerce store, you can create a retargeting campaign to run ads to people who have visited your store, added a product to their cart, but didn’t complete their order. You could create curated facebook ads that are tailored specifically to those people and help push them to checkout. This would be a perfect time to show reviews, testimonials, or handle any objections your audience may have that stopped them from completing their purchase.
Conversion Optimization
You can also track customers across your website and analyze their actions to determine the best ads to show them. Even if they use other devices, Facebook Pixel still allows you to monitor their behavior.

Ad Analytics
With Facebook Pixel, you can dive deep into your ad results and analyze all the metrics. This will help you understand which of your ads are effective and which ones don't work. For example: if you’re running any ads with video content, you can track the amount of people that played your video up to 50% of the time, 75% of the time, or watched 100% of your video ad. If you notice a sudden drop of video plays between 50% and 75%, consider reevaluating your video structure and see why people could be dropping off at that point. Analyze these metrics to push people to watch the full 100% of your ad video.
Setting Up Facebook Pixel
To set up Facebook Pixel, you must meet two base criteria.
- You own a website for your business
- You have access to update your site's code
If you use hosting networks like Shopify, WordPress, or Webflow, you should be able to update your site's code manually. It’s essential your Facebook Pixel Installation is done correctly in order to track and monitor your ad metrics accurately. It’s always recommended to go with Facebook Pixel Installation Experts to have a peace of mind that your business is starting off on the right foot.
However if you feel like you’ve got this handled, then let’s continue to the set up process.
Here are the steps to follow for Facebook Pixel Setup:
- From your Facebook Ad Manager, go to the Pixel section
- Select 'Create a Pixel'
- Create a name for your Pixel
- Click on 'Install Pixel Now'
- A base code will be automatically generated for your Pixel. Copy and paste the code between the tags on the specific web page you want to track
- If you want to install Facebook Pixel across your entire website, copy and paste the base code into your website template.
If your store is on Shopify, the process is slightly different;
- Within your Shopify admin panel, go to Sales channels and select Facebook.
- Click Settings, and then choose Data sharing settings.
- In the Customer data-sharing section, click the Enable data-sharing toggle.
- In the Choose data-sharing level section, click Standard, Enhanced, or Maximum.
- Select your Pixel from the list. If you don't have a pixel yet, follow the steps above to create one.
- Once you have picked your Pixel, click Confirm Understanding Facebook Pixel Events.
Like we mentioned earlier, Facebook Pixel basically records the actions that customers take on your site and allows you to analyze that information. These actions are known as 'events.' In Facebook Pixel, there are two types of events;

Standard Events
The standard events are the default actions that Facebook Pixel automatically recognizes. There are 17 Facebook Pixel Ad Standard Events:
- Purchase: Someone completes a purchase on your website.
- Lead: Someone signs up for a trial, gives their information, or completes an action that identifies themselves as a lead on your site.
- Complete registration: Someone completes a registration form on your site, such as a subscription form.
- Add payment info: Someone enters their payment information in the purchase process on your website.
- Add to cart: Someone adds a product to their shopping cart on your site.
- Add to wishlist: Someone adds a product to a wishlist on your site.
- Initiate checkout: Someone starts the checkout process to buy something from your site.
- Search: Someone uses the search function to look for something on your site.
- View content: Someone lands on a specific page on your website.
- Contact: Someone contacts your business.
- Customize product: Someone selects a specific version of a product, such as choosing a certain color.
- Donate: Someone donates to your cause.
- Find a location: Someone searches for your business's physical location.
- Schedule: Someone books an appointment at your business.
- Start trial: Someone signs up for a free trial of your product.
- Submit application: Someone applies for your product, service, or program, such as a credit card.
- Subscribe: Someone subscribes to a paid product or service.
These 17 events are the most common actions that customers take when they visit sites; hence they are a good starting point if you are just getting started with your Facebook Pixel. You can use these events to create campaigns and ad sets with specific ads. These ads should contain copywriting that maximizes conversions and are created in a strategic manner.
Custom events
At a more advanced level, you can decide to set up your own events. These events are unique to your site and are up to your discretion. Custom events usually have the ability to collect more information than standard events and hence will give more insight to your analytics team.
Conclusion
Many online business owners leave money on the table by not taking advantage of free tools that can drive sales like Facebook Pixel. Now more than ever, it’s essential for businesses to be advertising digitally on platforms their audience is potentially spending most of their time on: Facebook and Instagram. By not having your Facebook pixel for ads properly installed, you could be potentially putting your business at risk of inaccurate data tracking which is ultimately your advertising dollars down the drain. Consider investing into a team that will install your Facebook Pixel correctly so you can worry about running a business and not stressing out over confusing html codes. You’ll be surprised by how much data you’re able to analyze through Facebook pixel tracking that you can use to create an Omnichannel Digital Marketing Strategy.

.webp)


